MetaHuman 5.8
Note
We are working on automating most of these manual steps in the future. Stay tuned!
Prerequisites
Create a scan using the Copresence app and download the MetaHuman export of the scan from the Copresence web app. Extract the downloaded zip file to a location of your choice.
Now create a new Unreal Engine 5.8 project or open an existing one. Make sure you have the following plugins activated:
MetaHuman Creator (including the Core assets)
MetaHuman Core Tech
MetaHuman SDK
Groom
Alembic Groom Importer
1. Load Copresence Assets
1.1 Import
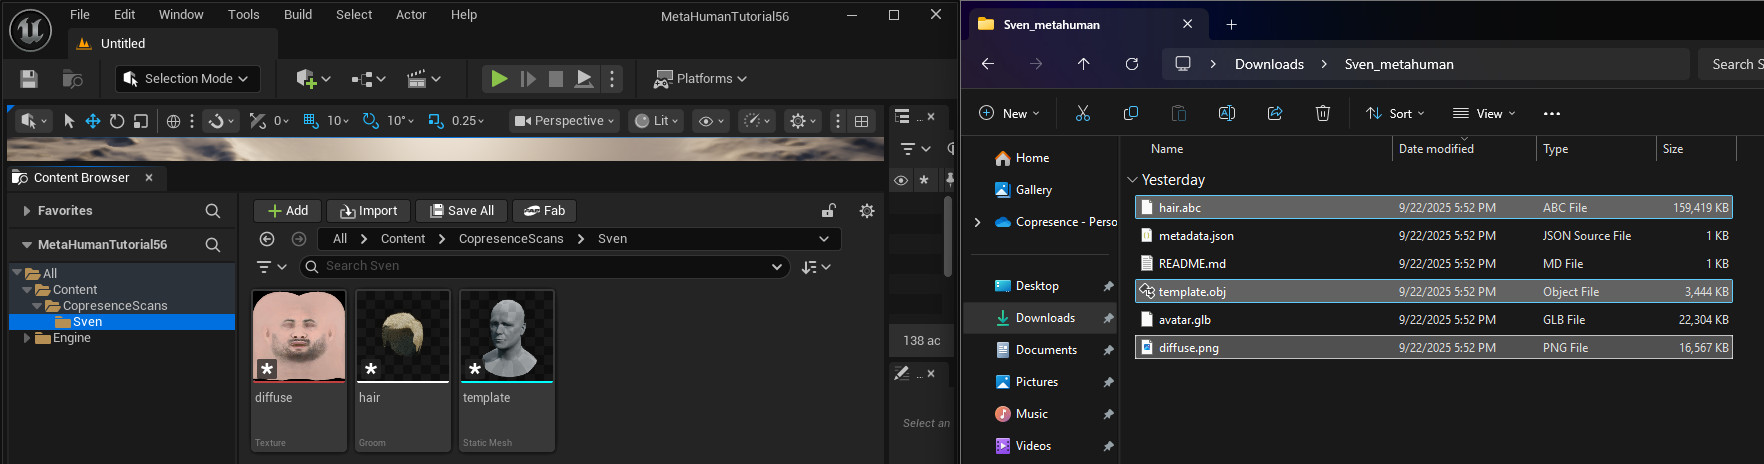
Go to your UE project and drag and drop the relevant Copresence assets from the extracted zip into your content drawer. The following files are required:
diffuse.png
hair.abc
Beard.abc if present
template.obj
Whenever a dialog opens on import, use the default settings and confirm.
1.2 Hair Preparation
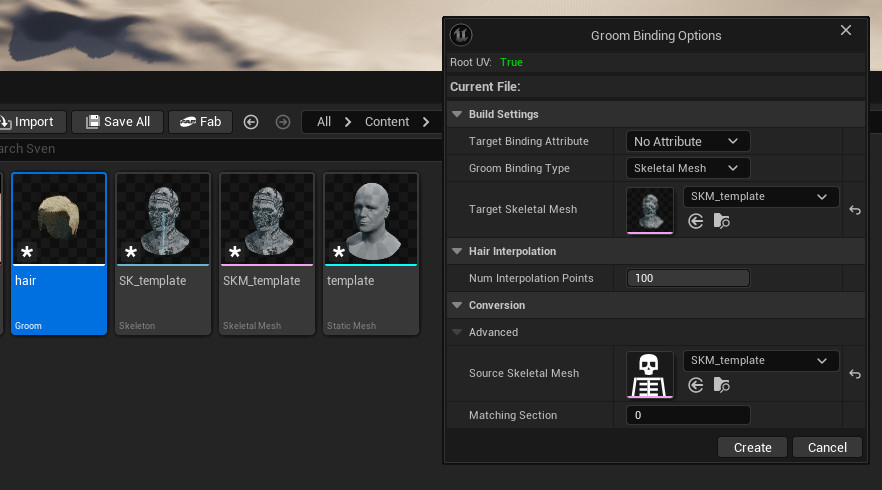
To use the imported hair assets hair.abc(and Beard.abc if it is present) later, groom bindings are required. Therefore, do the following:
Right-click the template mesh and click
Convert to Skeletal Mesh. Use the default settings and confirm.Right-click each of the groom assets and click
Create Binding Asset. Select the Skeletal Mesh object from the previous step as source and target. Create the bindings and save them in the editor window that opens.
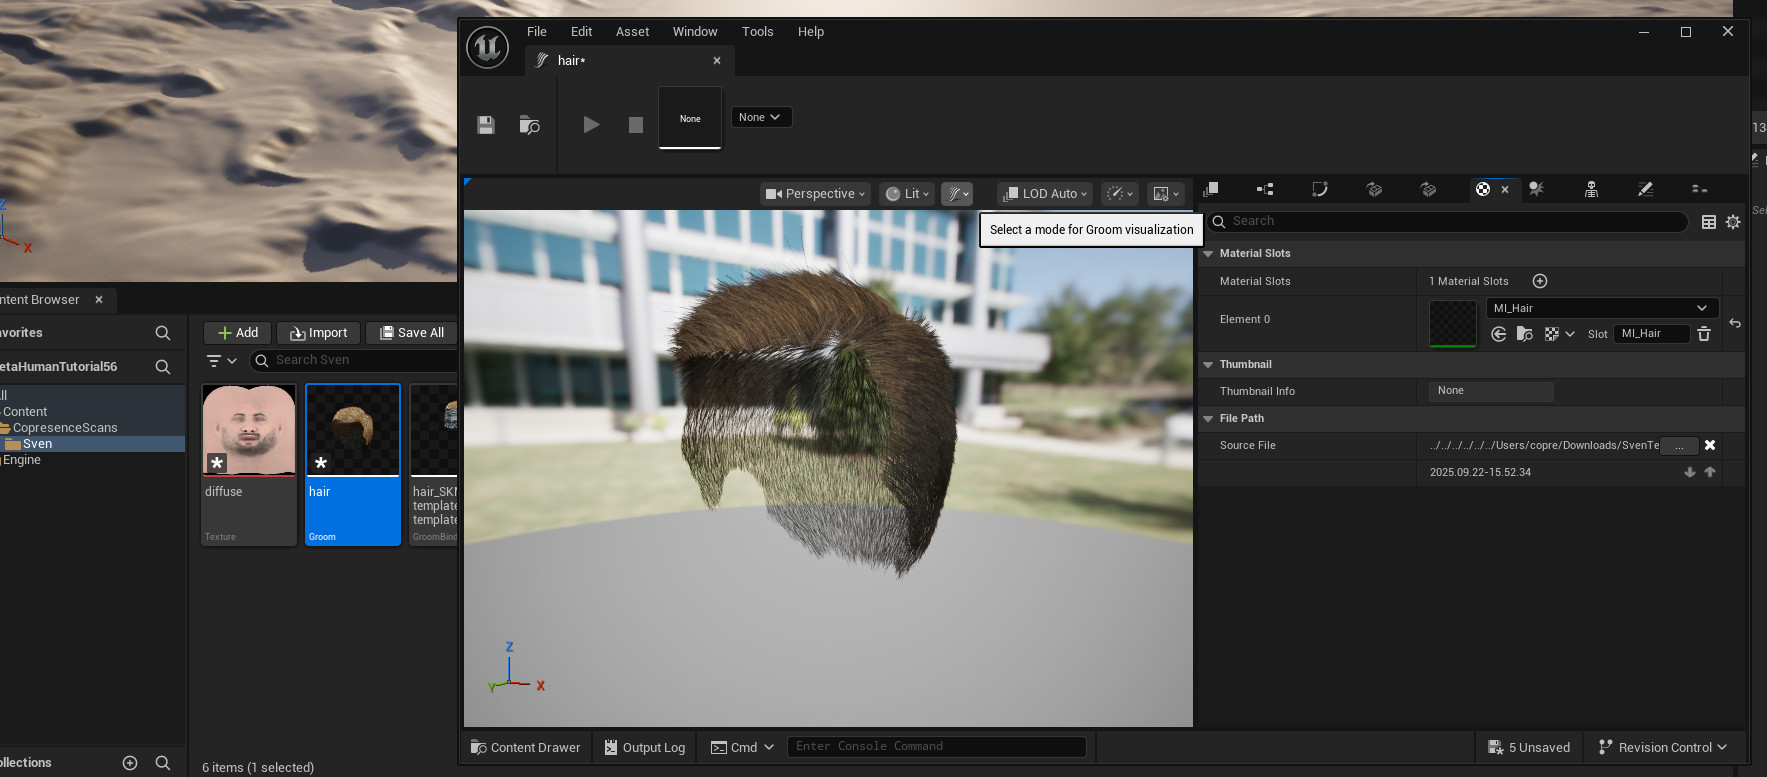
To properly adjust the hair colors and material properties later, double click each of imported groom asset. In the editor window, go to the material tab and create a new material slot. Select MI_Hair as material. You may also want to change the thickness, interpolation and physics settings in the other tabs.
After that everything is set up to be used in MetaHuman.
Missing MI_Hair material?
If you cannot select the MI_Hair material for the material slot, check the settings of your content browser and make sure both Plugin Content and Engine Content are enabled.
2. MetaHuman from Template Geometry
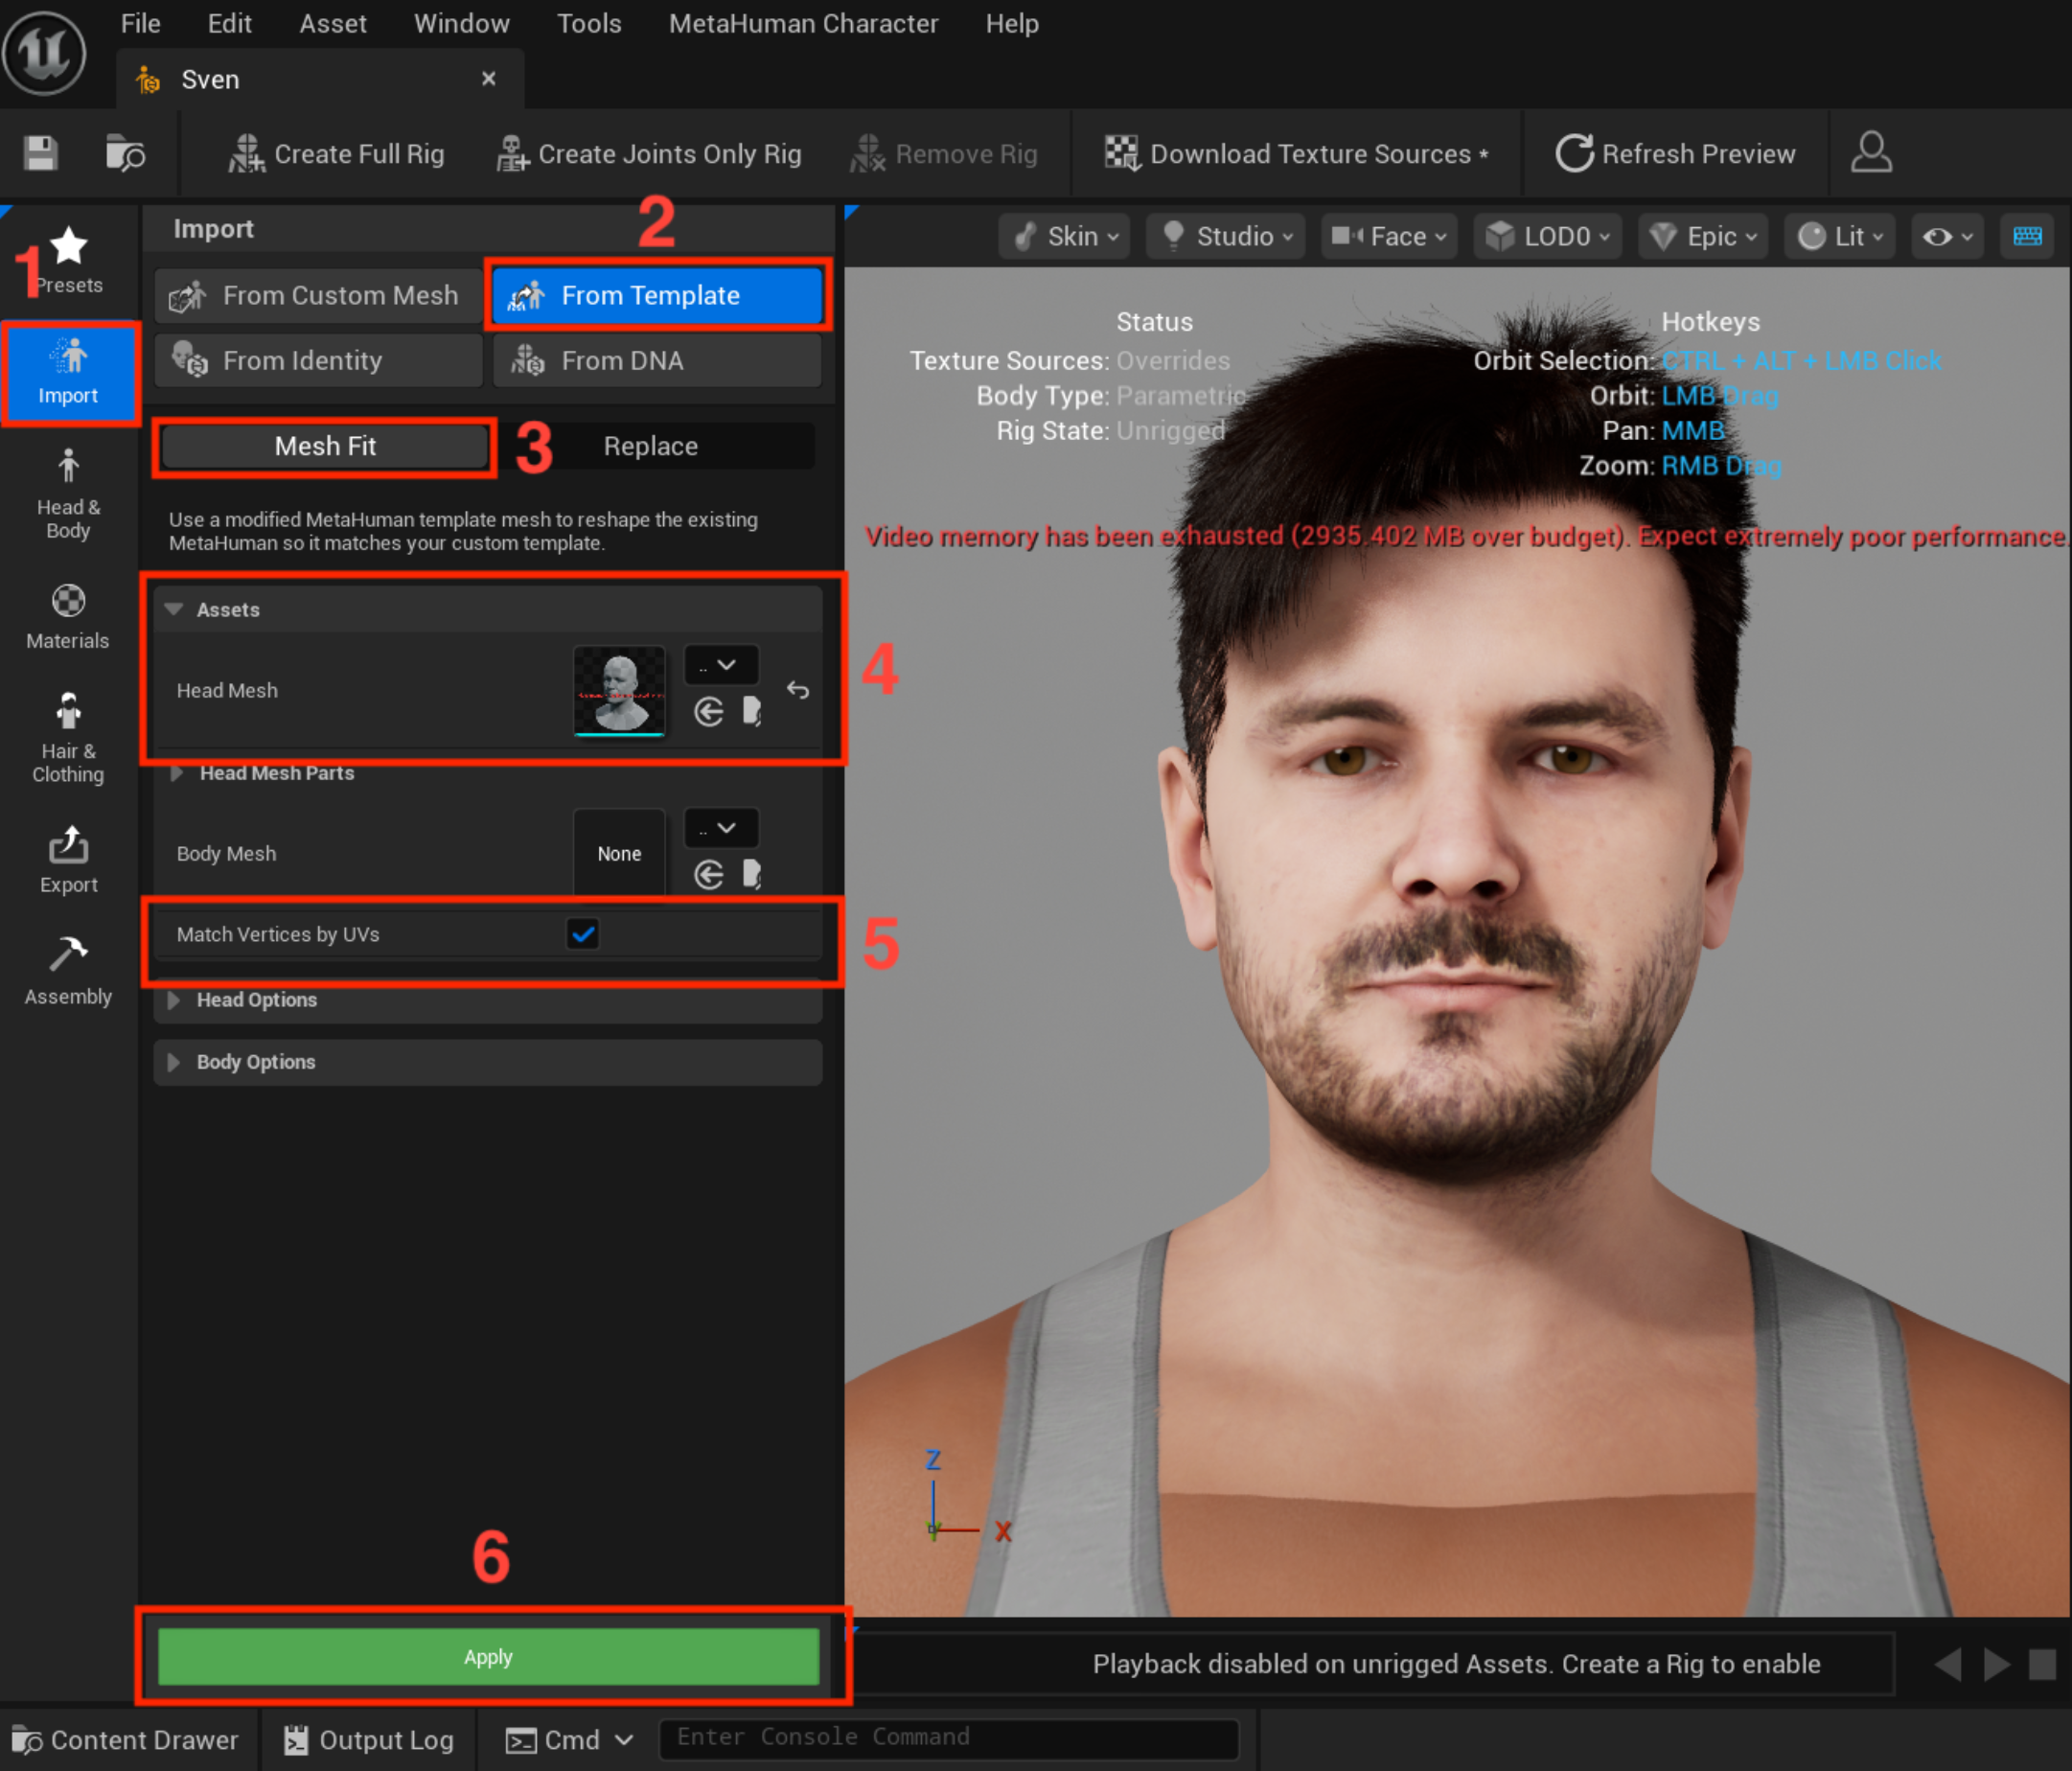
Right-click in your content browser and select MetaHuman Character under the MetaHuman sub-menu. Then double-click the newly created asset. The MetaHuman creator will open in a new window.
To transfer the geometry of your Copresence scan, select the Import section on the left. Select From Template, and then Mesh Fit.
Then look for the Head Mesh section of the Assets menu and choose the imported static mesh template as the mesh.
At the end click on Apply.
See the screenshot below for a better overview.
3. Assign Textures
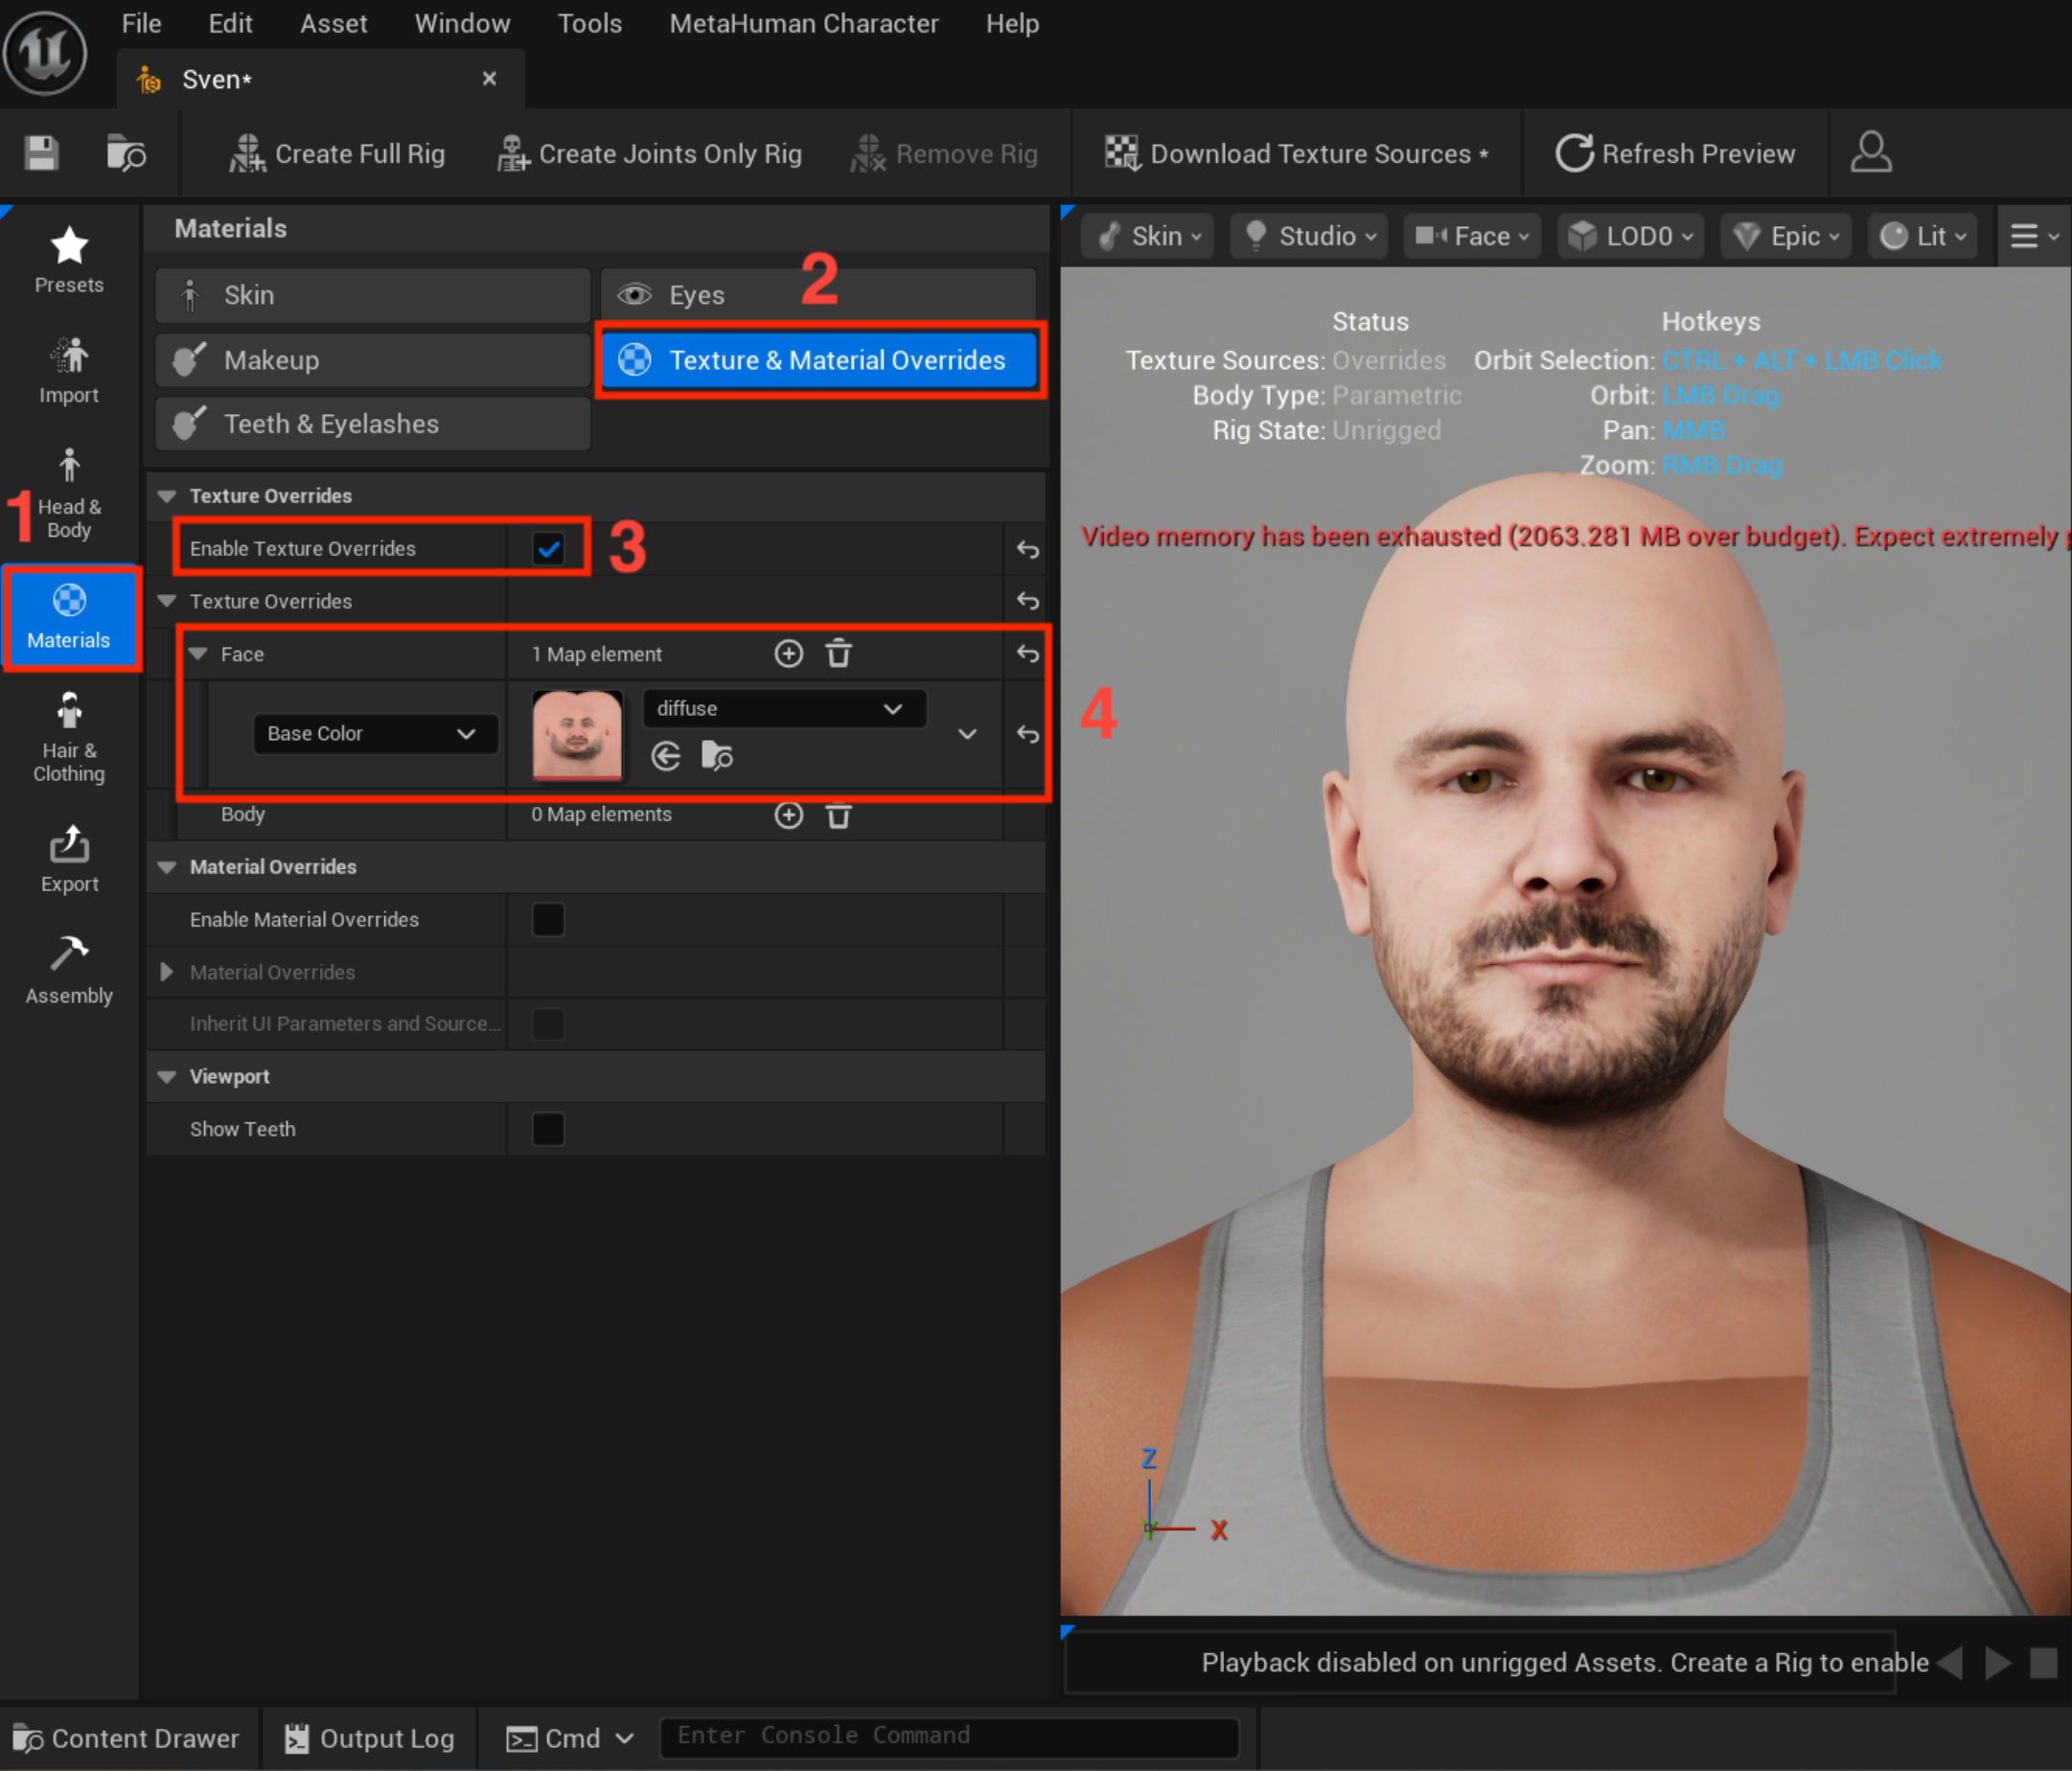
To use the scanned textures, select the Materials section on the left, and select Texture & Material Overrides.
Under the Texture Overrides menu, tick the Enable Texture Overrides box and look for the Face category of the newly present Texture Overrides menu.
Create a map element, select Base Color and pick the imported Diffuse texture added in the first step. Note, in the future we will export more maps that can be added here as well.
See the screenshot below for a better overview.
Optionally, at the top you may select a skin to that matches, the face texture well. Future releases will improved the blending between face and body textures.
4. Apply Hair
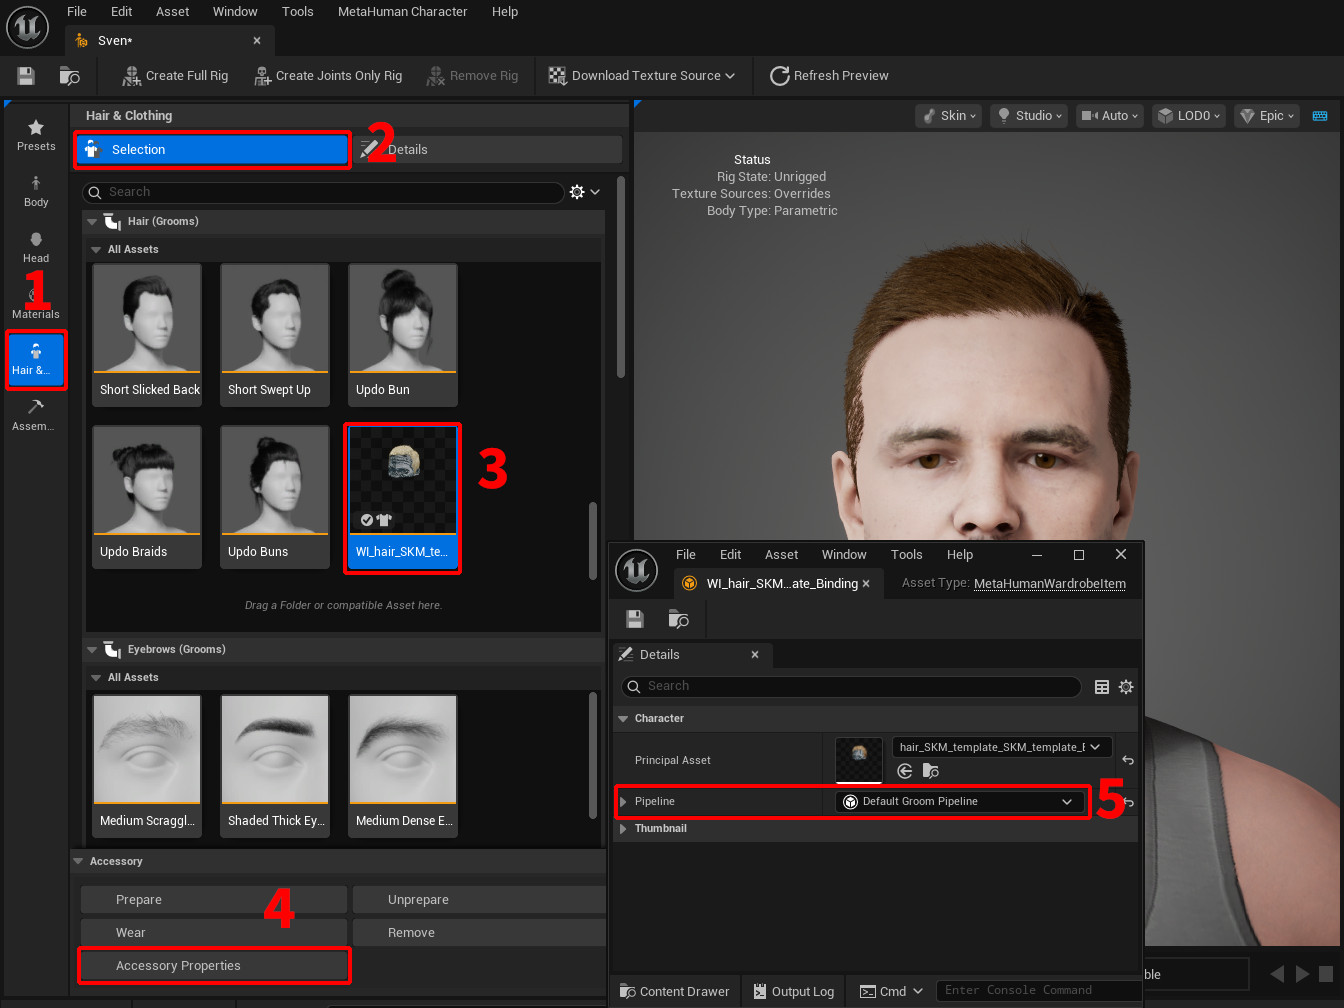
To add the scanned hair assets, select Hair & Clothing on the left and drag the hair binging asset created in step 1 to the grooms panel. Select it an click Accessory Properties. A window will open and under Pipeline select Default Groom Pipeline. Save and close the window. Now, after double-clicking your groom again, the MetaHuman will wear it. If a beard asset has been imported along with the hair, drag its groom binding into the Beard section of Hair & Clothing, then double click it just like with the hair. Under Details you can change material properties, for example hair color, dye color or roughness.
5. Customize and Assemble
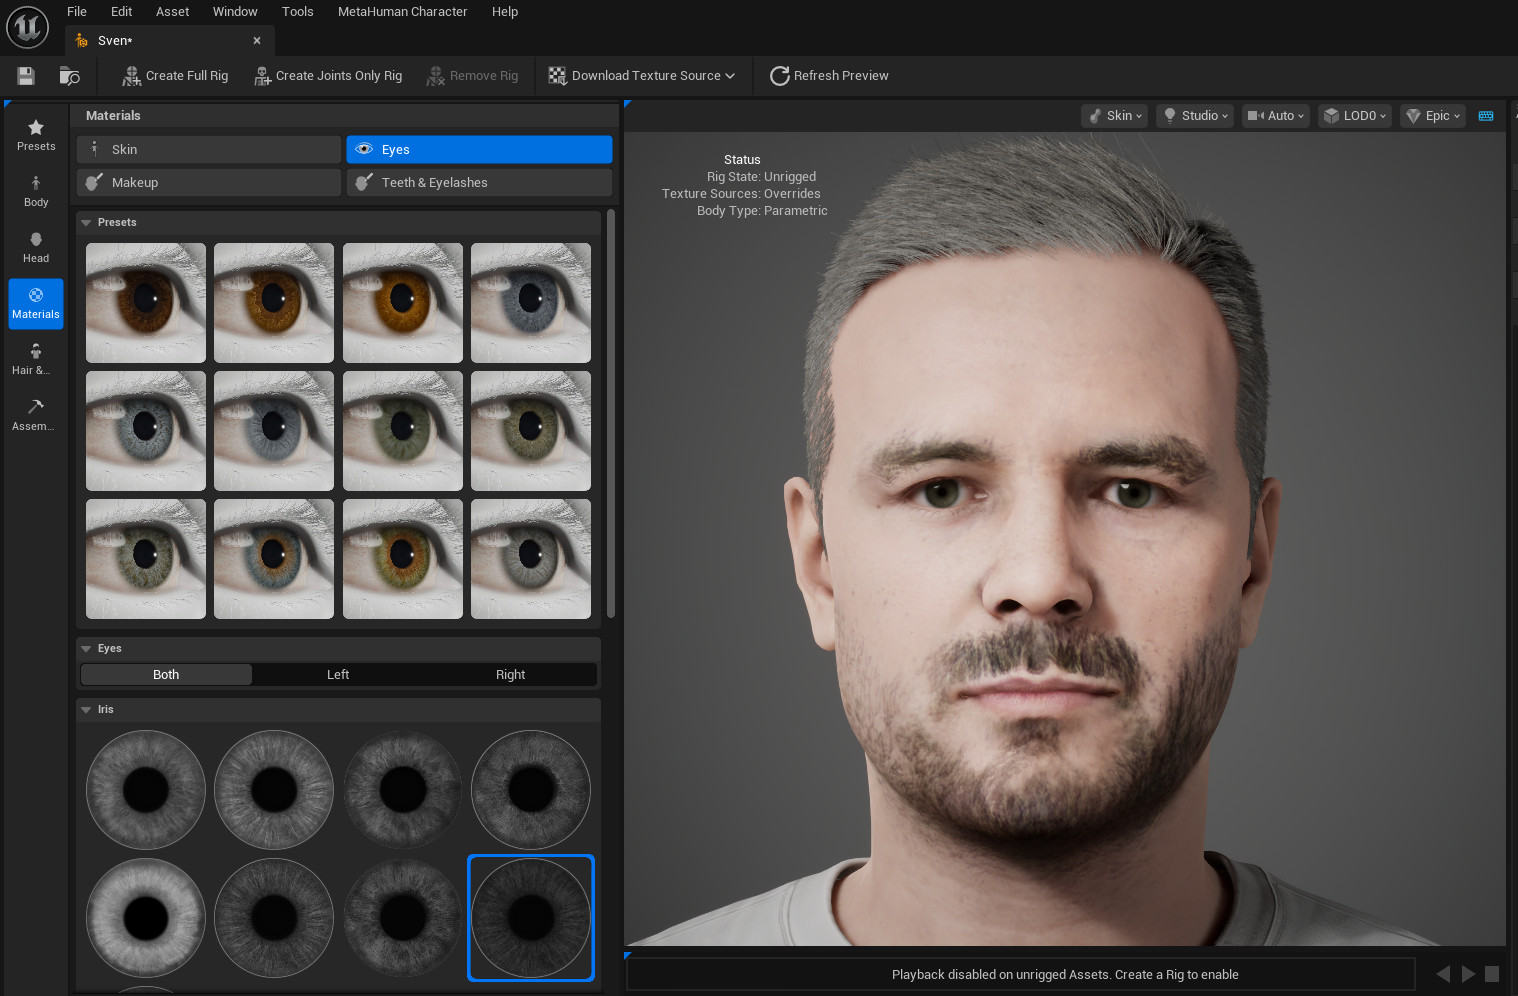
Before finalizing, you may add customizations. We recommend to choose a suitable eye color, align eyeballs in sculpt mode (if they look off) and add clothing. Then click Create Full Rig and Download Texture Source. Now, you will be able to assemble the final MetaHuman.
Note
We are working on automating most of these manual steps in the future. Stay tuned!